Welcome to the Quail Diaries, where we share our journey of hatching and raising quail for eggs and meat! Imagine tiny, adorable chicks growing into beautiful, laying hens right in your backyard. From the excitement of watching eggs hatch to the thrill of collecting fresh eggs each day, raising quail is an adventure like no other. If you’ve ever wondered what it’s like to dive into the world of these charming little birds, you’re in for a treat. We’ll cover everything from the initial setup, the daily care routines, and the joys and challenges we’ve faced along the way. Let’s take a fun and detailed look at what it really takes to raise quail, and why these pint-sized poultry might just become your new favorite hobby. Be prepared this will be a long read…
Where do I begin?
Our quail adventure began when we ordered our eggs from The Thieving Otter, a delightful farm in Portland, Tennessee renowned for its variety of quail eggs. The process was simple and the staff was incredibly helpful, providing us with detailed instructions and tips for a successful hatch. When the package arrived, we were thrilled to see that every egg was intact—no breaks, no cracks, just perfect little ovals ready to hatch. The eggs were carefully packed with soft, protective materials to cushion them during transit, ensuring they arrived in pristine condition. The anticipation was palpable as we gently unpacked each egg, marveling at the different colors and patterns that hinted at the diverse breeds we had chosen. This initial success set the stage for an exciting and hopeful start to our quail-raising journey.
Hatching Time: The Waiting Game
The process of hatching quail eggs is a blend of excitement and patience, requiring the right tools and a watchful eye. Here’s a detailed breakdown of what you need and what to expect:
Gathering Supplies
Before you start, make sure you have the following essentials. The incubator I chose to use has all of the things listed below in one product, it’s the easiest way to go about hatching quail.
- Incubator: Choose one that allows for precise temperature and humidity control.
- Thermometer and Hygrometer: These are crucial for monitoring the temperature and humidity levels inside the incubator.
- Egg Turner: While not strictly necessary, an automatic egg turner can save you a lot of manual effort.
- Water Source: To maintain humidity, you’ll need a way to add water to the incubator. Many incubators have built-in water trays.
Setting Up the Incubator
- Temperature: Set the incubator to a consistent 99.5°F. This temperature is crucial for the development of the embryos.
- Humidity: Maintain a humidity level between 45-55% for the first 18 days. This can be adjusted by adding water to the incubator’s trays or using a sponge.
Turning the Eggs
Quail eggs need to be turned several times a day to ensure even development. If you have an automatic egg turner, this process is simplified. If not, you’ll need to gently turn the eggs by hand 3-5 times a day. Marking one side of the eggs with a pencil can help you keep track of which ones have been turned.
The Final Days
Around day 18, it’s time to prepare for the hatching phase:
- Stop Turning: On day 18, stop turning the eggs. This allows the chicks to position themselves for hatching.
- Increase Humidity: Raise the humidity to 65-75%. This helps to soften the eggshells, making it easier for the chicks to break through.
- Lockdown: Keep the incubator closed as much as possible to maintain stable conditions.
The Magic of Hatching
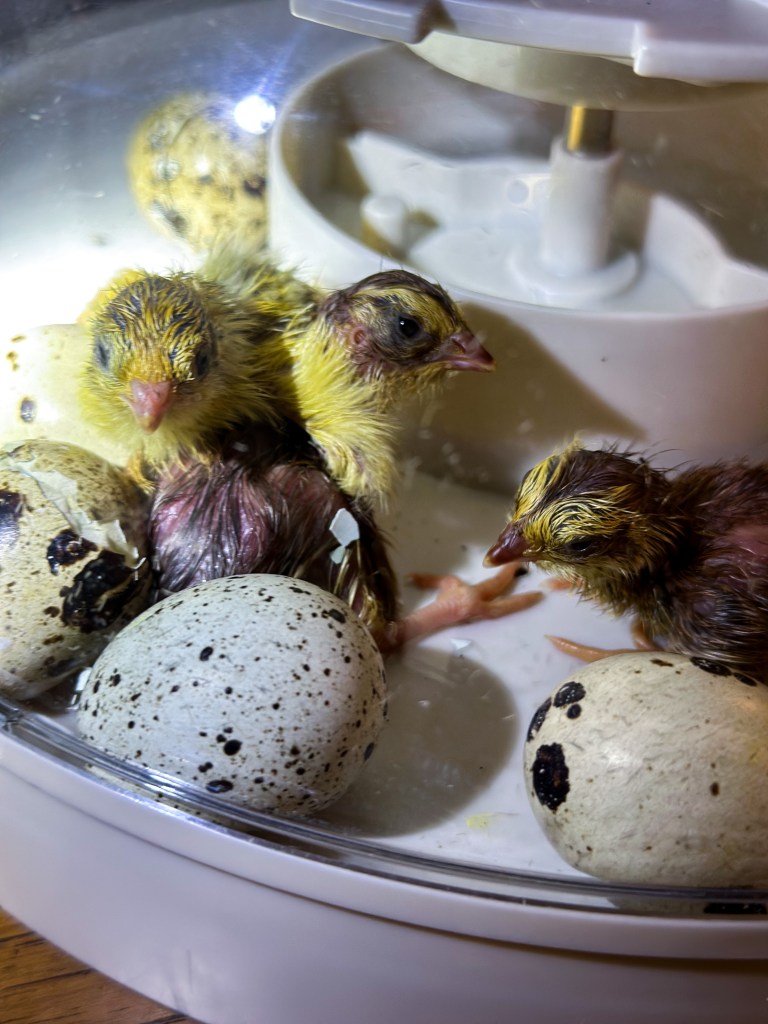
On day 21, the magic happens. Tiny beaks start to peck through the shells in a process known as “pipping.” Here’s what to look for:
- Pipping: The chicks make a small hole in the shell, which can take several hours.
- Zipping: After pipping, the chicks begin to “zip,” or peck around the circumference of the egg, creating a line.
- Hatching: Finally, the chicks push the shell apart and emerge, wet and exhausted.
Once the chicks hatch:
- Drying Off: The chicks will begin to dry off quickly and fluff up. Leave the chicks in the incubator until they are dry and fluffy, usually within 24 hours.
- Brooder Setup: Prepare a brooder with a heat lamp set to 95°F, reducing by 5°F each week until they are fully feathered. Ensure they have access to fresh water and a high-protein starter feed (28-30%).
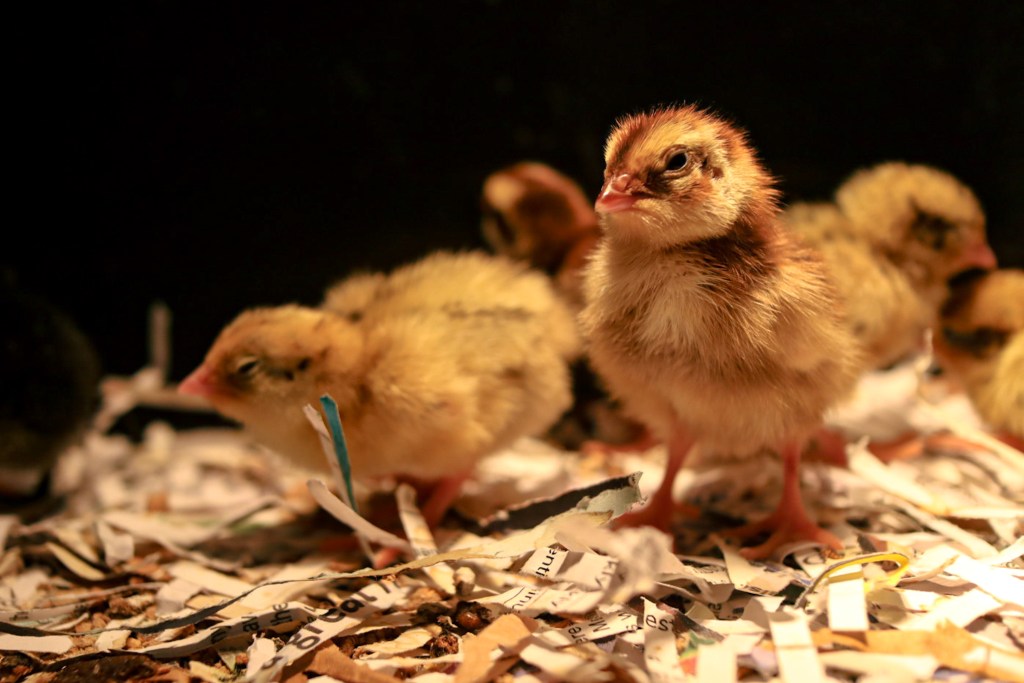
For my brooder setup, I use a large plastic storage container, which is both practical and affordable. I modified the lid by cutting out the center and stapling chicken wire over the opening to ensure proper airflow. To keep the chicks warm, I placed a heat lamp on top. Alternatively, you could use a brooder heating plate that goes inside the bin. While these plates take up more space and are pricier, they are also a fantastic option for maintaining consistent warmth.
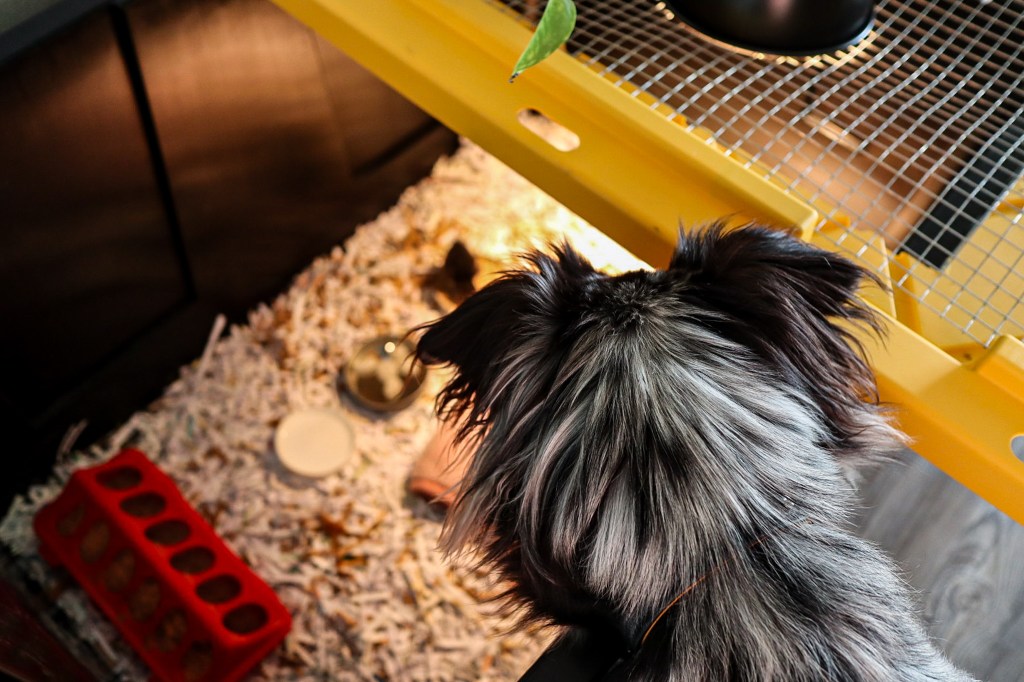
For bedding, I use shredded paper from home, which keeps the quail happy and clean. This method has proven effective and is a cost-efficient alternative to purchasing commercial bedding. There are many different brooder setups, ranging from simple to extravagant, but the essentials remain the same: heat, water, food, and a clean environment.
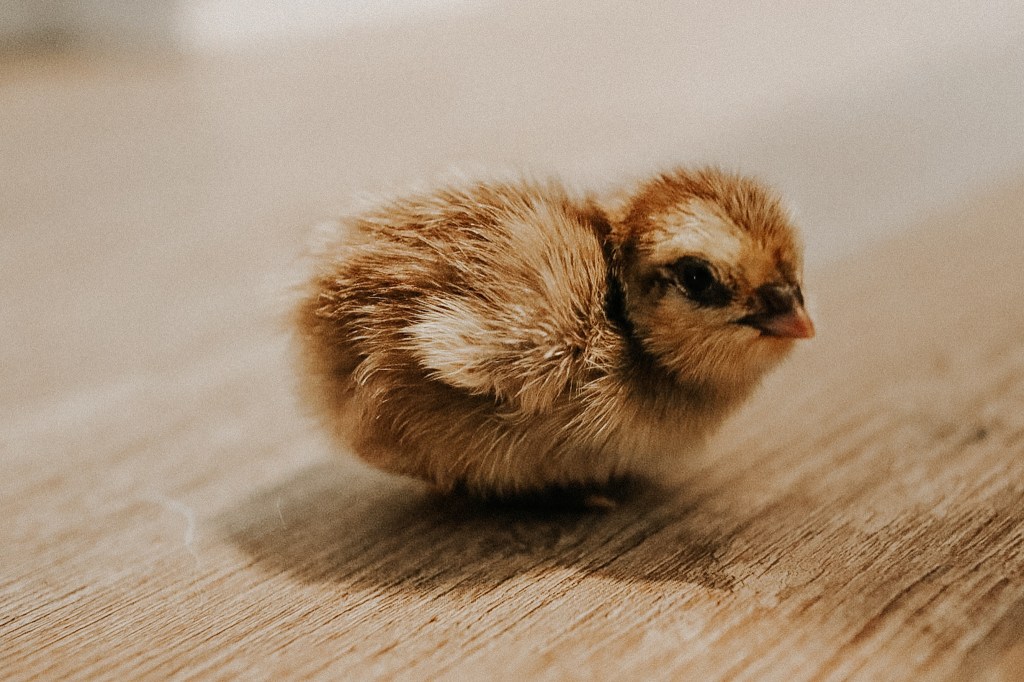
Cuteness Overload: Baby Quail Chicks

When the chicks finally emerged, they were the cutest little fuzzballs you’ve ever seen! These tiny creatures grow incredibly fast, almost doubling in size within a week. But as delightful as they are, the hatching process can come with its fair share of unexpected moments. Here’s a deeper dive into what you might encounter:
Watching the chicks hatch is truly magical, but it’s important to be prepared for the unexpected:
1. Early or Late Hatchers: Not all chicks hatch right on schedule. Some might arrive a day or two early, while others could be a few days late. Patience is key, and keeping a close eye on the incubator during the expected hatching window is crucial.
2. Assisted Hatches: Occasionally, a chick might struggle to break free from its shell. It’s a delicate decision whether to assist or not. Generally, it’s best to let nature take its course, but if a chick is clearly in distress and has been struggling for more than 24 hours, gentle assistance might be necessary. Be very careful, as premature intervention can harm the chick.
3. Humidity Drops: Opening the incubator during the hatching process can cause a sudden drop in humidity, which can make it harder for chicks to hatch. Try to minimize opening the incubator door, especially once pipping has started.
Fast Growth and Early Challenges
These tiny quail chicks grow incredibly fast, but the first few days can be fraught with challenges:
1. Heat Requirements: The chicks need a brooder with a heat lamp set to 95°F for the first week, decreasing by 5°F each week until they are fully feathered. A good thermometer is essential to monitor the temperature.
2. Hydration Hazards: Quail chicks are notorious for drowning in their water sources. Use shallow dishes with marbles or rocks in them to prevent this from happening. The marbles provide a safe way for the chicks to drink without getting submerged.
3. Nutritional Needs: They require a steady supply of water and high-protein feed (28-30% protein is ideal for those fast-growing babies). Sometimes, chicks might need a little encouragement to start eating and drinking. Gently dipping their beaks into water and food can help them get the hang of it.
Common Health Issues
Even with the best care, health issues can arise:
1. Splayed Legs: This condition, where a chick’s legs splay out to the sides, can sometimes occur. It’s often due to a slick surface in the brooder. Providing a textured surface, like paper towels, can help prevent this. If it does happen, hobbling the legs with a small bandage can sometimes correct it. I had to use the shot glass method with a chick from my last hatch because it was severe but she survived and is doing great!
2. Pasty Butt: This is when feces stick to the chick’s vent area, potentially blocking it. Regularly check and gently clean any buildup with a warm, damp cloth.
3. Heat Stress: If chicks are too hot, they may pant and spread out away from the heat source. Conversely, if they’re too cold, they’ll huddle together under the lamp. Adjust the height of the heat lamp based on their behavior to ensure they are comfortable.
The Thrill of Progress

Despite the challenges, watching your quail chicks thrive is immensely rewarding:
1. Rapid Growth: Within a week, they’ll nearly double in size. It’s fascinating to see their feathers start to come in and their personalities begin to show. This is my favorite part! I love getting to see their feathers change and discover what colors they will be.
2. Exploration: Once they’re more stable, you’ll notice them becoming more curious and adventurous. This is a great time to introduce them to different textures and objects in the brooder for enrichment.
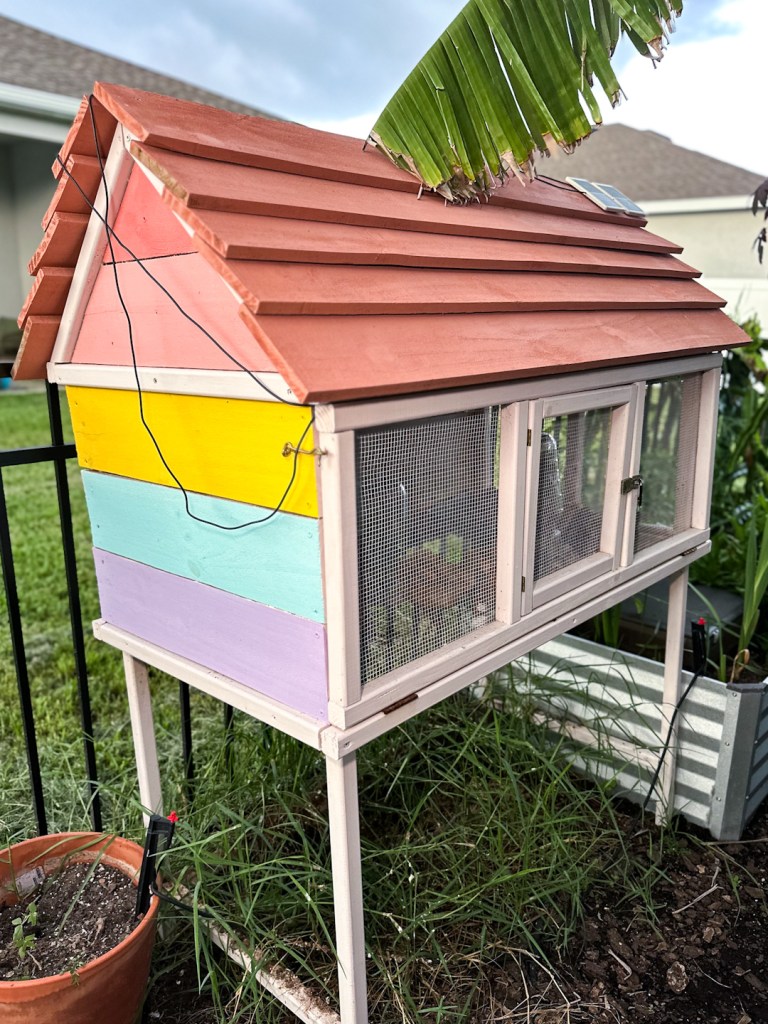
3. Moving Outdoors: At around 4-6 weeks old, the quail were ready to move to their outdoor pen. It’s a big step, and ensuring they have a secure, predator-proof enclosure with adequate space is essential for their continued growth and safety. We ordered plans for a farmhouse cottage-style hutch on Etsy, which turned out to be the perfect size to hold 12 quail comfortably. The plans were easy to follow, and the finished hutch was gorgeous, even if the quail didn’t seem to care much about aesthetics. The enclosure is secure with different latches and locks to protect the quail from predators and the elements. We made sure it had plenty of ventilation, adding wire to one of the sides, areas for dust bathing, and cozy nesting spots. It’s crucial to keep their feet dry, as wet feet can lead to chilling and health problems.
Egg-cellent Production: Keeping Quail Happy
Ensuring our quail are happy and productive requires careful attention to their environment and needs, especially when it comes to egg production.
Light Requirements
For optimal egg production, quail need at least 14-16 hours of light each day, which can come from natural sunlight or be supplemented with artificial lighting. Initially, their enclosure was too shaded, which affected their egg production. So, I relocated it to a sunnier spot. During the winter, if supplemental light is needed, I use solar lights with timers to ensure they get enough light. Living in Florida, I don’t have to do this often, but it’s handy for nighttime checks. The artificial light mimics longer daylight hours, encouraging the quail to lay eggs consistently.
Balanced Diet
Feeding our quail a balanced diet is crucial for their health and egg production. We provided a high-quality feed with 20-24% protein, which is essential for their growth and laying cycles. Additionally, we included calcium supplements in their diet to ensure strong eggshells. Crushed oyster shells or eggshells served as excellent sources of calcium, which the quail readily consumed. Fresh greens and occasional treats like mealworms are also part of their diet, adding variety and extra nutrients.
Water Supply
A steady supply of fresh, clean water is vital. We check their water supply daily, making sure it was always available and clean. In hot weather, we replaced the water more frequently to keep it cool and prevent dehydration. Using waterers designed to minimize spillage and contamination helped maintain a hygienic environment.
Clean Environment
Maintaining a clean and sanitary enclosure is essential for the health and happiness of our quail. We clean their living space regularly, removing waste and replacing their dust bath regularly. Regular cleaning prevents the buildup of harmful bacteria and parasites, promoting a healthier living environment.
Enclosure Setup
Our quail’s enclosure was designed to provide a safe and comfortable space. We ensured it was predator-proof, using hardware cloth instead of chicken wire to keep out unwanted guests. The enclosure included hiding spots allowing the quail to exhibit natural behaviors and reducing stress. Proper ventilation was also crucial to avoid ammonia buildup from droppings, ensuring a fresh and breathable environment.
Health Monitoring
Regular health checks are an integral part of keeping our quail happy and productive. We monitor their behavior and physical condition, looking for signs of illness or stress. Prompt attention to any health issues, such as treating mites or providing necessary medical care, help to maintain a healthy flock.
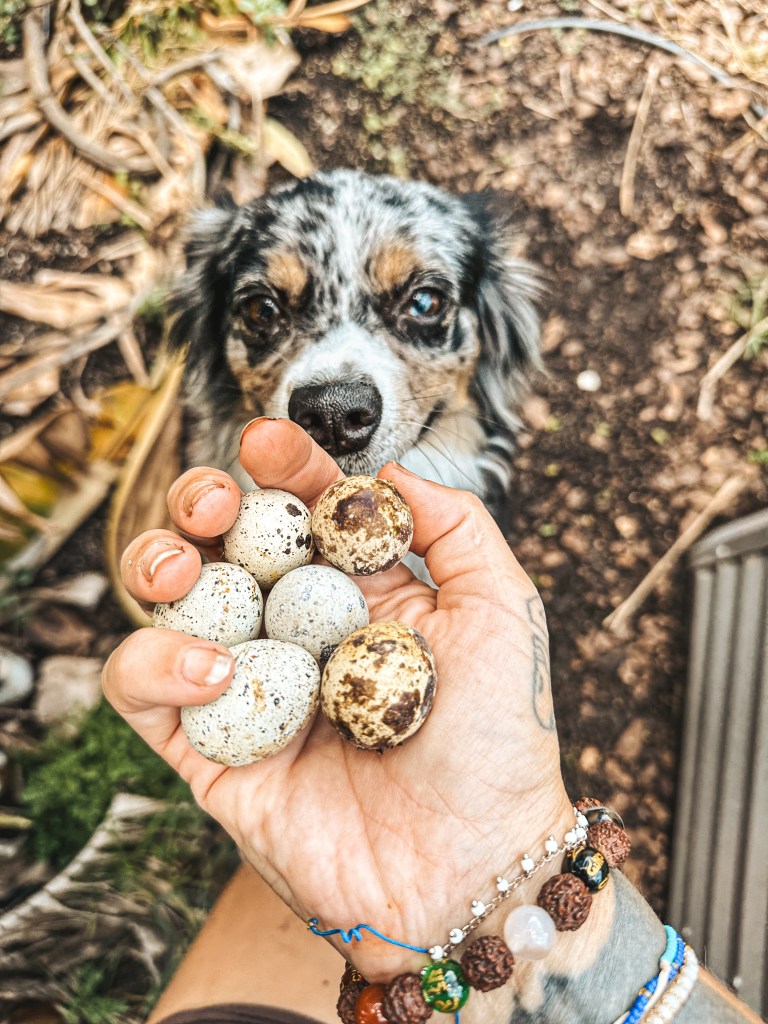
Egg Collection
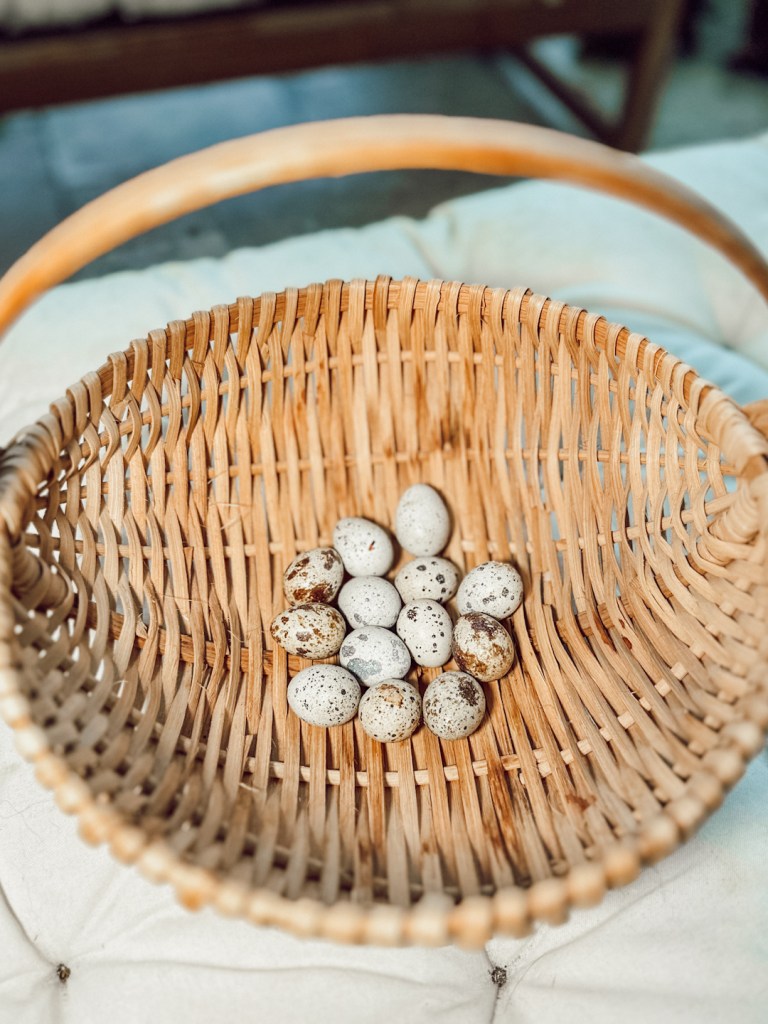
This is Phoenix’s favorite part! Collecting eggs daily prevents them from becoming dirty or damaged. It also encourages the quail to continue laying by ensuring their nests were not overcrowded. We handle the eggs carefully, storing them in a cool, dry place until ready for use or incubation.
By providing the right light, diet, and environment, along with diligent care and regular health monitoring, we kept our quail healthy and happy, ensuring a steady supply of fresh, high-quality eggs. Raising quail for egg production has been a rewarding experience, offering both delicious results and the satisfaction of well-cared-for birds.
Hardships: The Tough Parts of Raising Quail
Raising quail isn’t all sunshine and rainbows. We faced some significant challenges along the way, each one teaching us valuable lessons about patience, resilience, and the realities of animal husbandry.
Losing Baby Chicks
One of the hardest parts of raising quail is the inevitable loss of some baby chicks. Despite our best efforts to provide a warm, safe environment, not all chicks make it. The first time it happened, it was heartbreaking. We carefully monitored the incubator conditions, made sure the brooder was at the right temperature, and did everything by the book, but sometimes, nature has its own plans. I chose to assist two chicks that were stuck in their eggs and we ended up losing them both. It was heartbreaking. Each loss is a tough reminder of the fragility of life, but it also motivates us to continually improve our care, setup and how we handle each situation when it arises.
Processing for Meat
Another significant challenge was processing our first quail for meat. With no prior experience, the thought of it was daunting. We watched countless tutorials, read numerous guides, and still felt unprepared. The first attempt was nerve-wracking, and the emotional weight of taking a life for sustenance was heavy. However, it was also an important step in understanding the full cycle of raising animals for food. With each processing session, we hope to became more efficient and respectful of the process, always striving to do it as humanely and swiftly as possible.
Dealing with Aggressive Males
Male quails can sometimes become aggressive, especially during the breeding season. We found ourselves needing to separate and eventually process the more aggressive males to keep the peace in our flock. It was a tough decision, but necessary to ensure the safety and well-being of the other birds. Understanding quail behavior and learning to manage it effectively is a crucial part of raising these birds.
Unexpected Health Issues
Quail, like any other animals, can fall ill or develop health issues. We encountered a a case of splayed legs, where the chicks’ legs spread out to the sides, making it difficult for them to walk. This required immediate attention and a delicate approach to correct. Additionally, we dealt with pasty butt, a condition where droppings stick to the chick’s vent area, potentially blocking it. Regular checks and gentle cleaning were necessary to prevent serious health problems.
Learning Curve
The entire process has been a steep learning curve. From setting up the incubator to ensuring the right nutrition and environment for the chicks, each step came with its own set of challenges. We made mistakes along the way, but each one taught us something new. The key is to stay patient and be willing to adapt and learn. There is so much information out there and even with all the research you still miss things.
Emotional Challenges
The emotional aspect of raising quail for meat can be particularly challenging. Becoming attached to the birds and then having to process them requires a significant mental shift. It’s a constant reminder of the responsibility and respect we owe to the animals we raise. We love and care for them deeply, but we also know that, at some point, we will have to process them. While I understand it will get easier with time, it remains a difficult and emotionally taxing part of the experience for now.
Despite these hardships, raising quail has been an incredibly rewarding journey. Each challenge has made us better caretakers and more appreciative of the food we produce. The resilience and adaptability we’ve developed along the way have made the successes even more satisfying.
Final Thoughts on Raising Quail

Raising quail has been an incredibly rewarding journey, filled with both challenges and triumphs. From the initial excitement of receiving our eggs from The Thieving Otter to the joy of seeing our first chicks hatch, every step has been a learning experience.
One of the most gratifying aspects of raising quail is the daily collection of fresh, nutritious eggs. Quail eggs are not only delicious but also packed with protein, vitamins, and minerals. They add a unique touch to our meals and make all the hard work worthwhile.
Raising quail for meat has also been a fulfilling endeavor. The process of breeding, raising, and eventually processing quail for meat has given us a deep appreciation for the food we consume. It’s a sustainable and healthy source of protein that supports our goal of living more self-sufficiently.
Raising quail has also opened up opportunities to share our experiences and knowledge with others. Whether it’s through our blog, social media, or talking with clients and friends, we love connecting with fellow enthusiasts and newcomers. It’s heartening to see others inspired to start their own quail-raising journey.
Where to Find More Information
If you’re interested in raising quail or want to learn more about the process, there are plenty of resources available:
Books and Guides: Look for comprehensive books on quail care and breeding. Titles like “The Complete Guide To Quail Farming” offer detailed insights and step-by-step instructions.
Online Forums and Communities: Websites like BackyardChickens.com and quail-specific forums are great places to ask questions, share experiences, and learn from other quail enthusiasts. There are lots of groups on facebook that are great resources.
YouTube Channels: Many experienced quail raisers share their knowledge through video tutorials. Channels like Living Traditions Homestead and Slightly Rednecked offer practical advice and demonstrations.
Local Extension Services: Many universities and agricultural extensions offer resources and workshops on raising poultry, including quail. They can provide valuable local insights and support.
Raising quail is a journey full of learning, patience, and rewards. Whether you’re in it for the fresh eggs, the sustainable meat, or the sheer joy of watching these tiny birds grow, there’s something truly special about it. Embrace the challenges, celebrate the successes, and enjoy every moment. Happy quailing! 🌟🐣🥚


Leave a comment